The Ornament Plan - What I’m Making & Why
Alright, so here's where the plan starts to get real.
I spent the last few days thinking about what aesthetic would work for our little 4ft flocked tree, what I actually have materials for, and what I can realistically make without losing my mind. And I think I've landed on something that feels both intentional and doable.
The Aesthetic: Muted Vintage 1950s
When I say "1950s Christmas," I don't mean the bright, shiny, perfectly coordinated version. I mean the faded, well-loved version—like vintage ornaments that have mellowed over decades, or the kind of handmade decorations you'd find in a 1950s craft book where everything was made from scraps and ingenuity.
Our flocked tree is the perfect canvas for this. It's soft, it's neutral, and it doesn't need a lot of stuff to look intentional. Plus, I have wood beads that I'm not painting (because why mess with a good thing?), so leaning into natural tones and muted colors just makes sense.
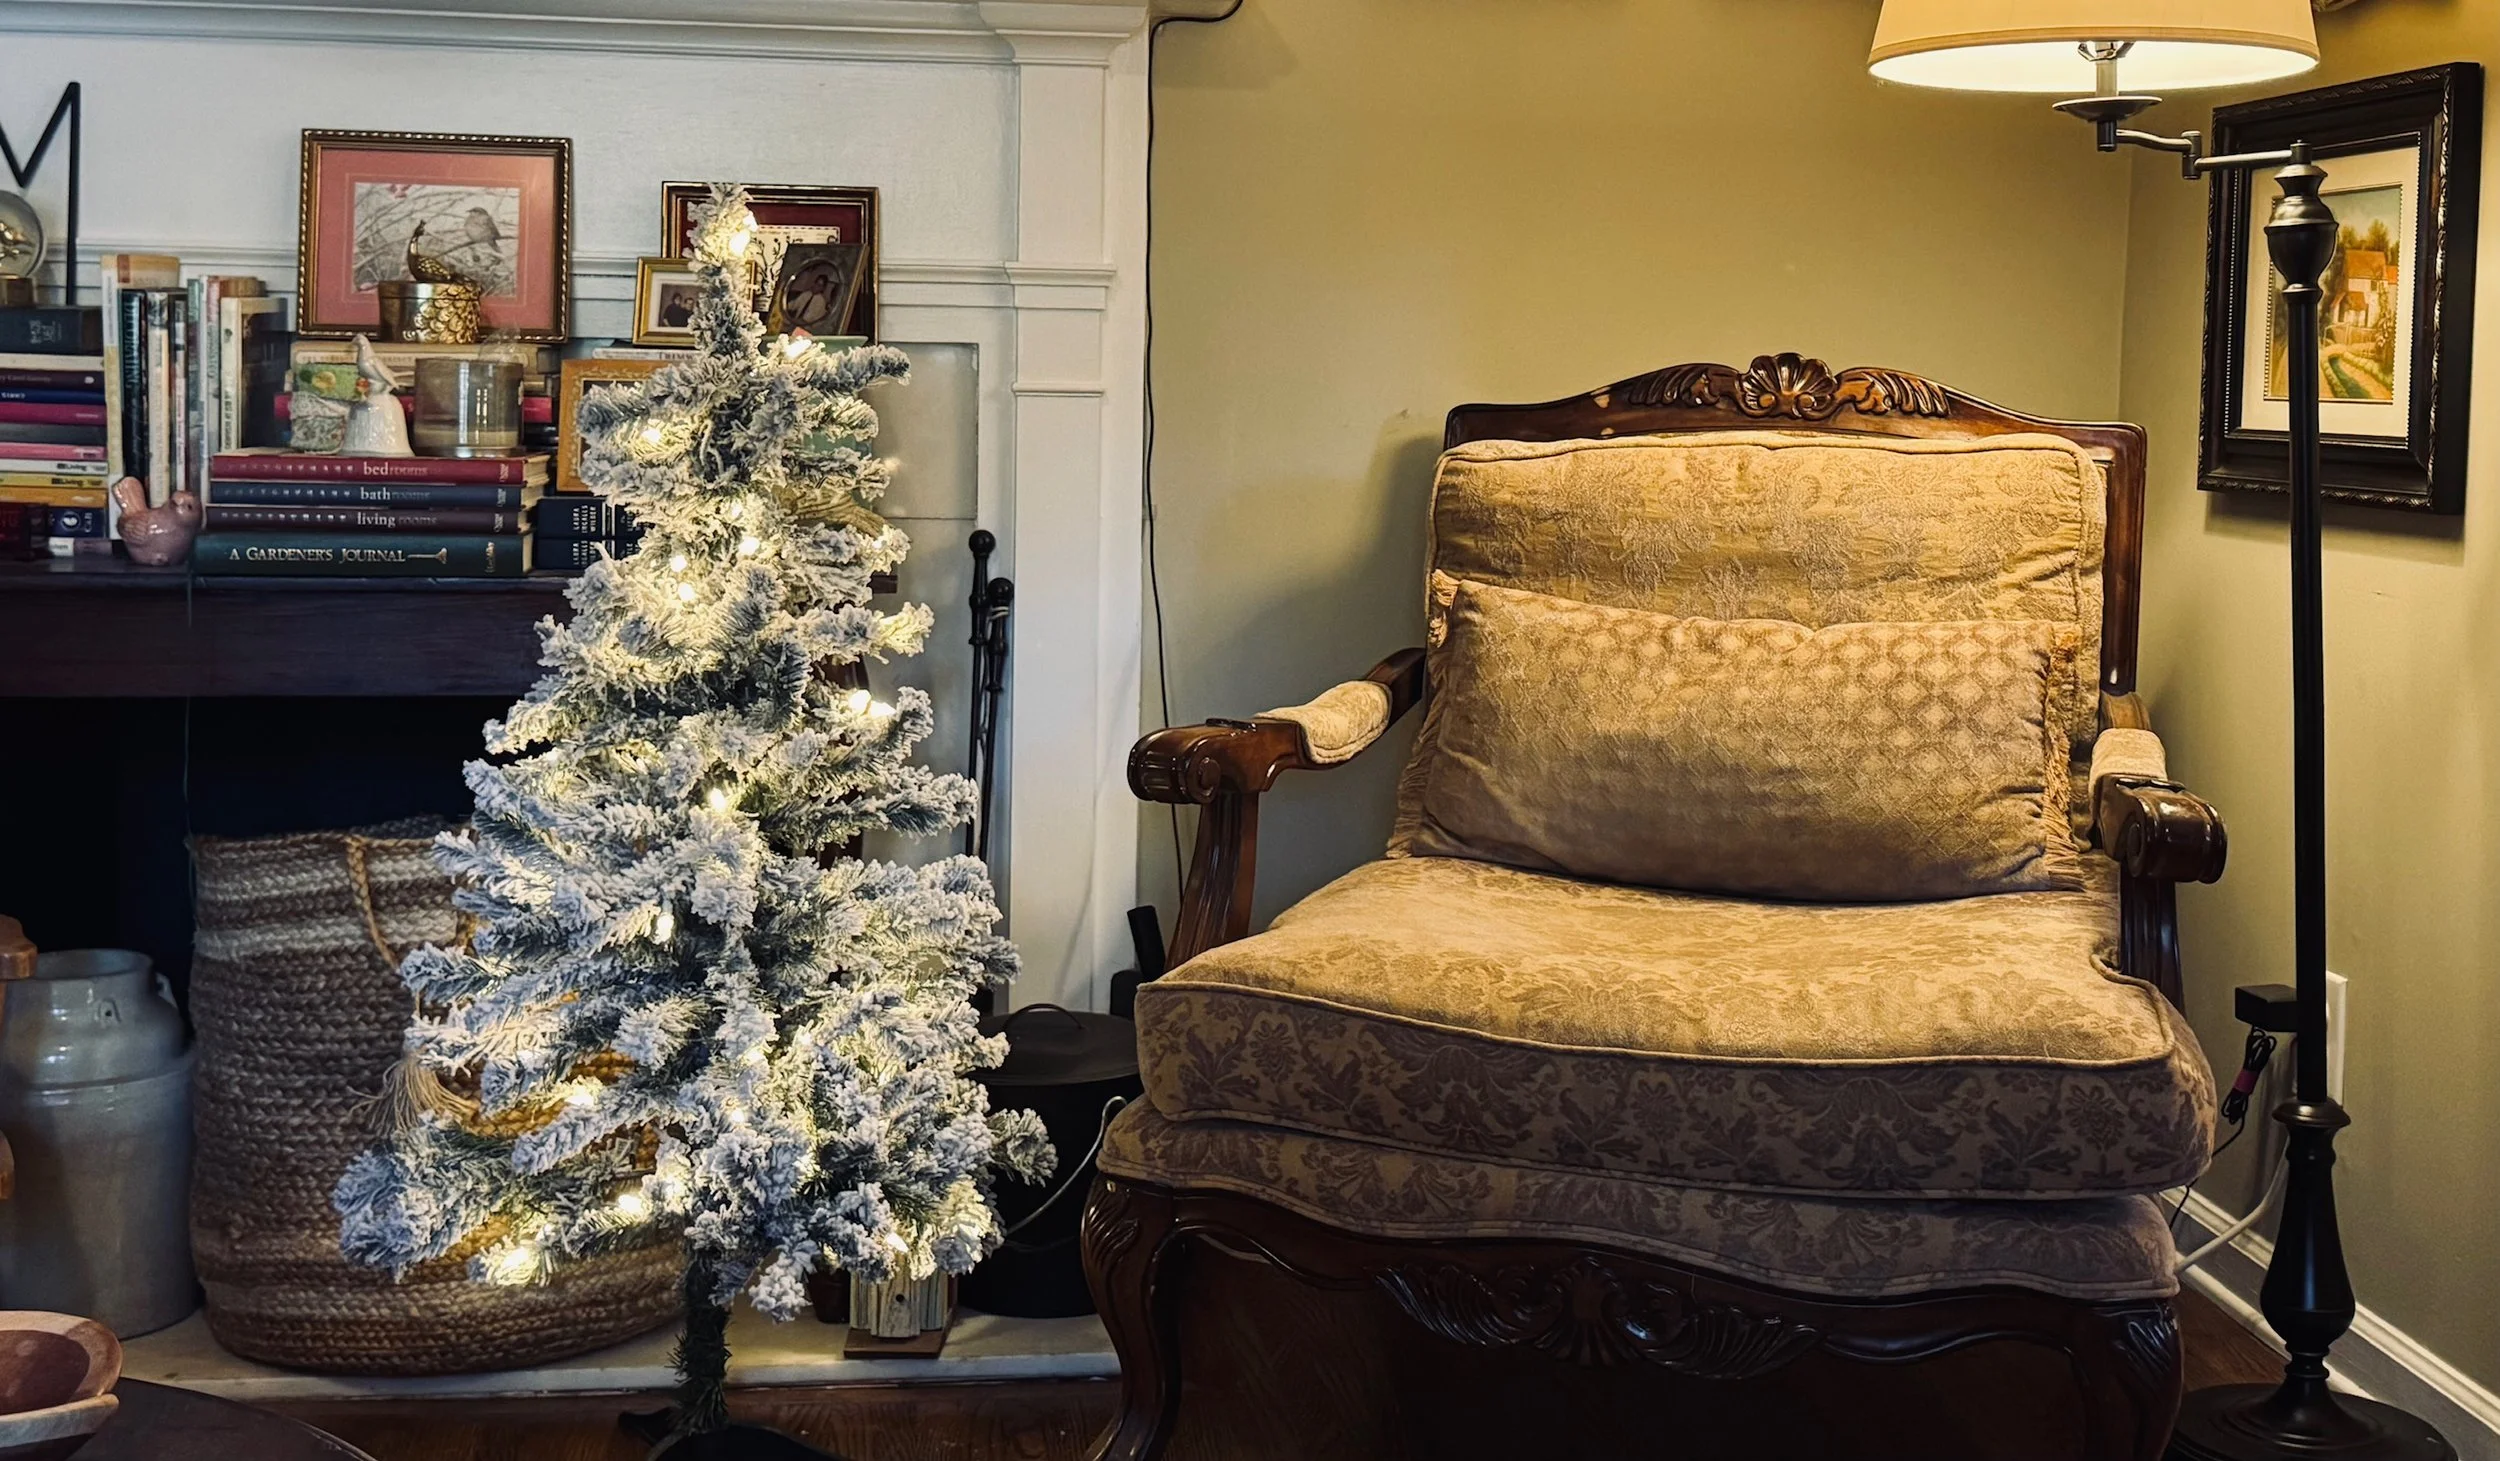
Just out of the closet
Pitiful & unfluffed. She has Charlie Brown vibes that I’m not mad about.
Is she even 4’? Maybe 3’. Whatever. We measure with our heart around here and she is what she is. Let’s make her pretty.
The Color Palette
Here's what I'm working with:
Cream/ivory (plays beautifully with the flocked tree)
Dusty rose/mauve/maybe a splash of cranberry here and there
Sage green or soft olive
Mustard yellow/soft gold
Rust/burnt orange
Natural wood tones
Touches of grey, charcoal, or navy
Think: vintage postcards, faded Shiny Brite ornaments, old craft fair projects your grandma might've made. Warm but not loud. Cohesive but not matchy-matchy.
The Ornament List
I'm making six types of ornaments (plus the garland). Some will be quick, some will take time, but they all work together aesthetically and use materials I already have.
1. Salt Dough Ornaments (10-15 pieces)
Classic retro Christmas shapes—think bulbs, stars, trees, maybe some geometric mid-century shapes. Some will be painted in the muted palette, some will stay natural with painted details, and some might get a little glitter because it's Christmas and I contain multitudes.
Materials I have: Flour, salt, water, acrylic paints, glitter
Time investment: Medium to Long (dough is quick, but painting and details take time)
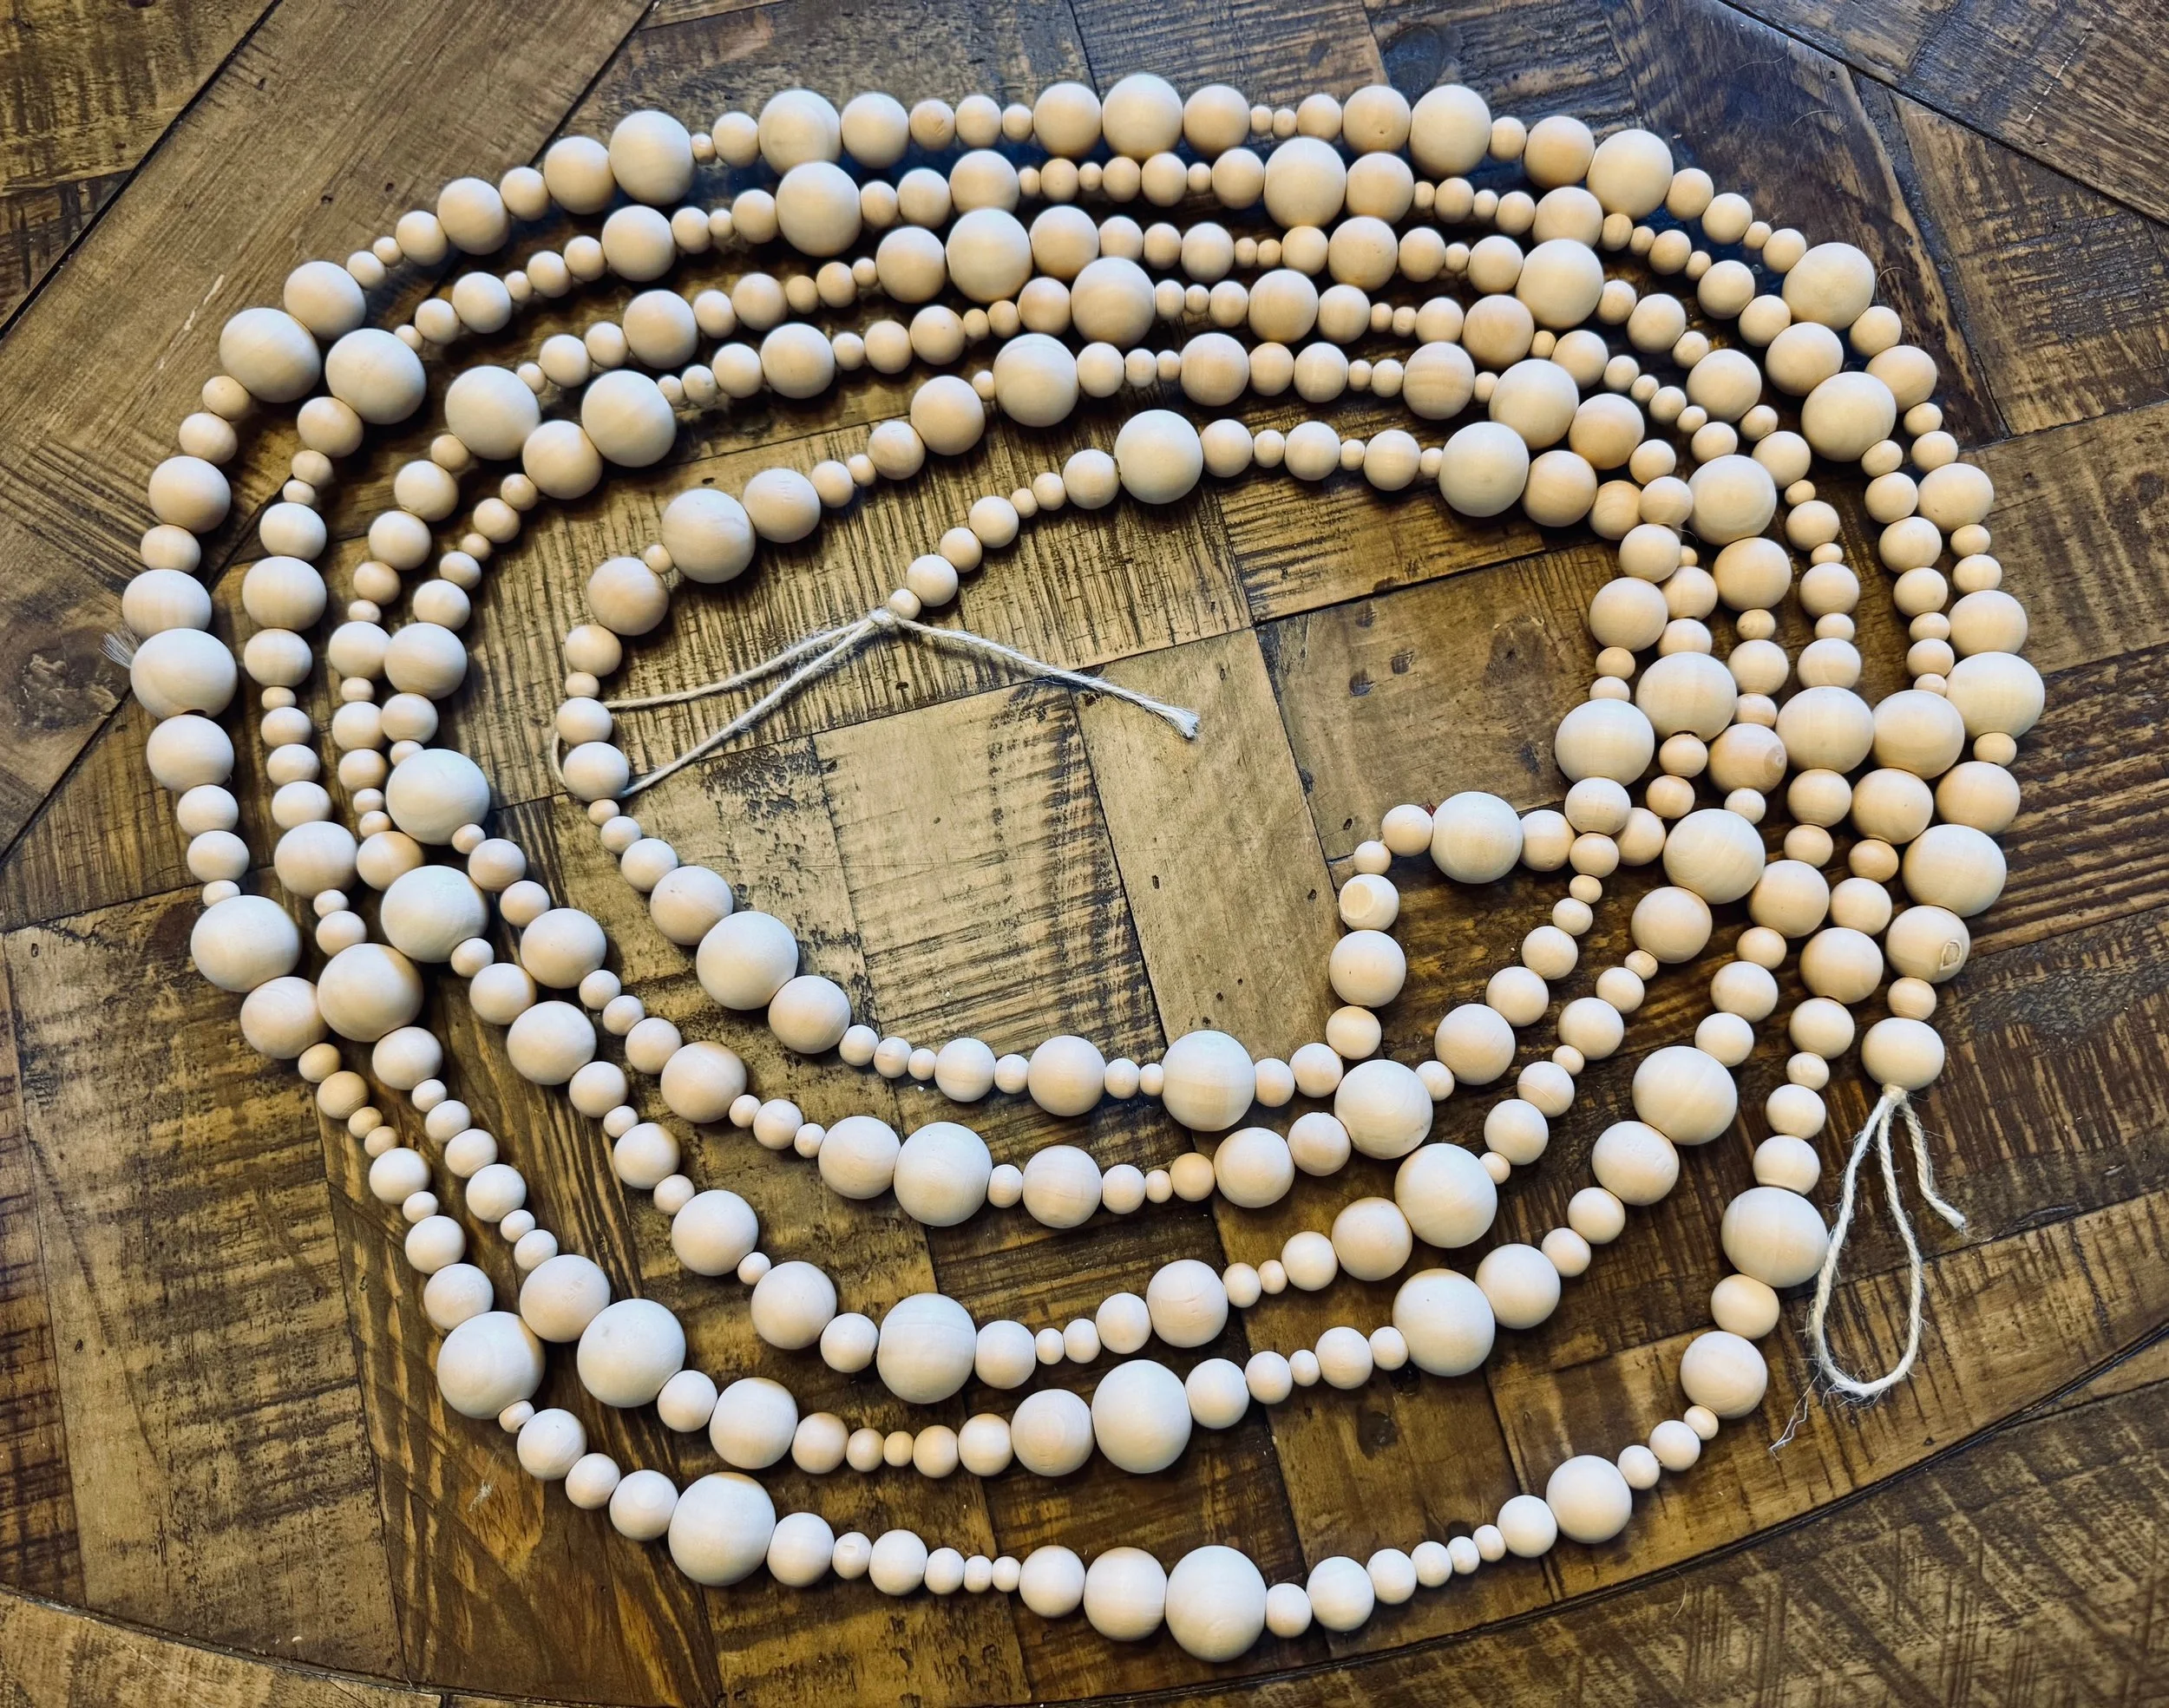
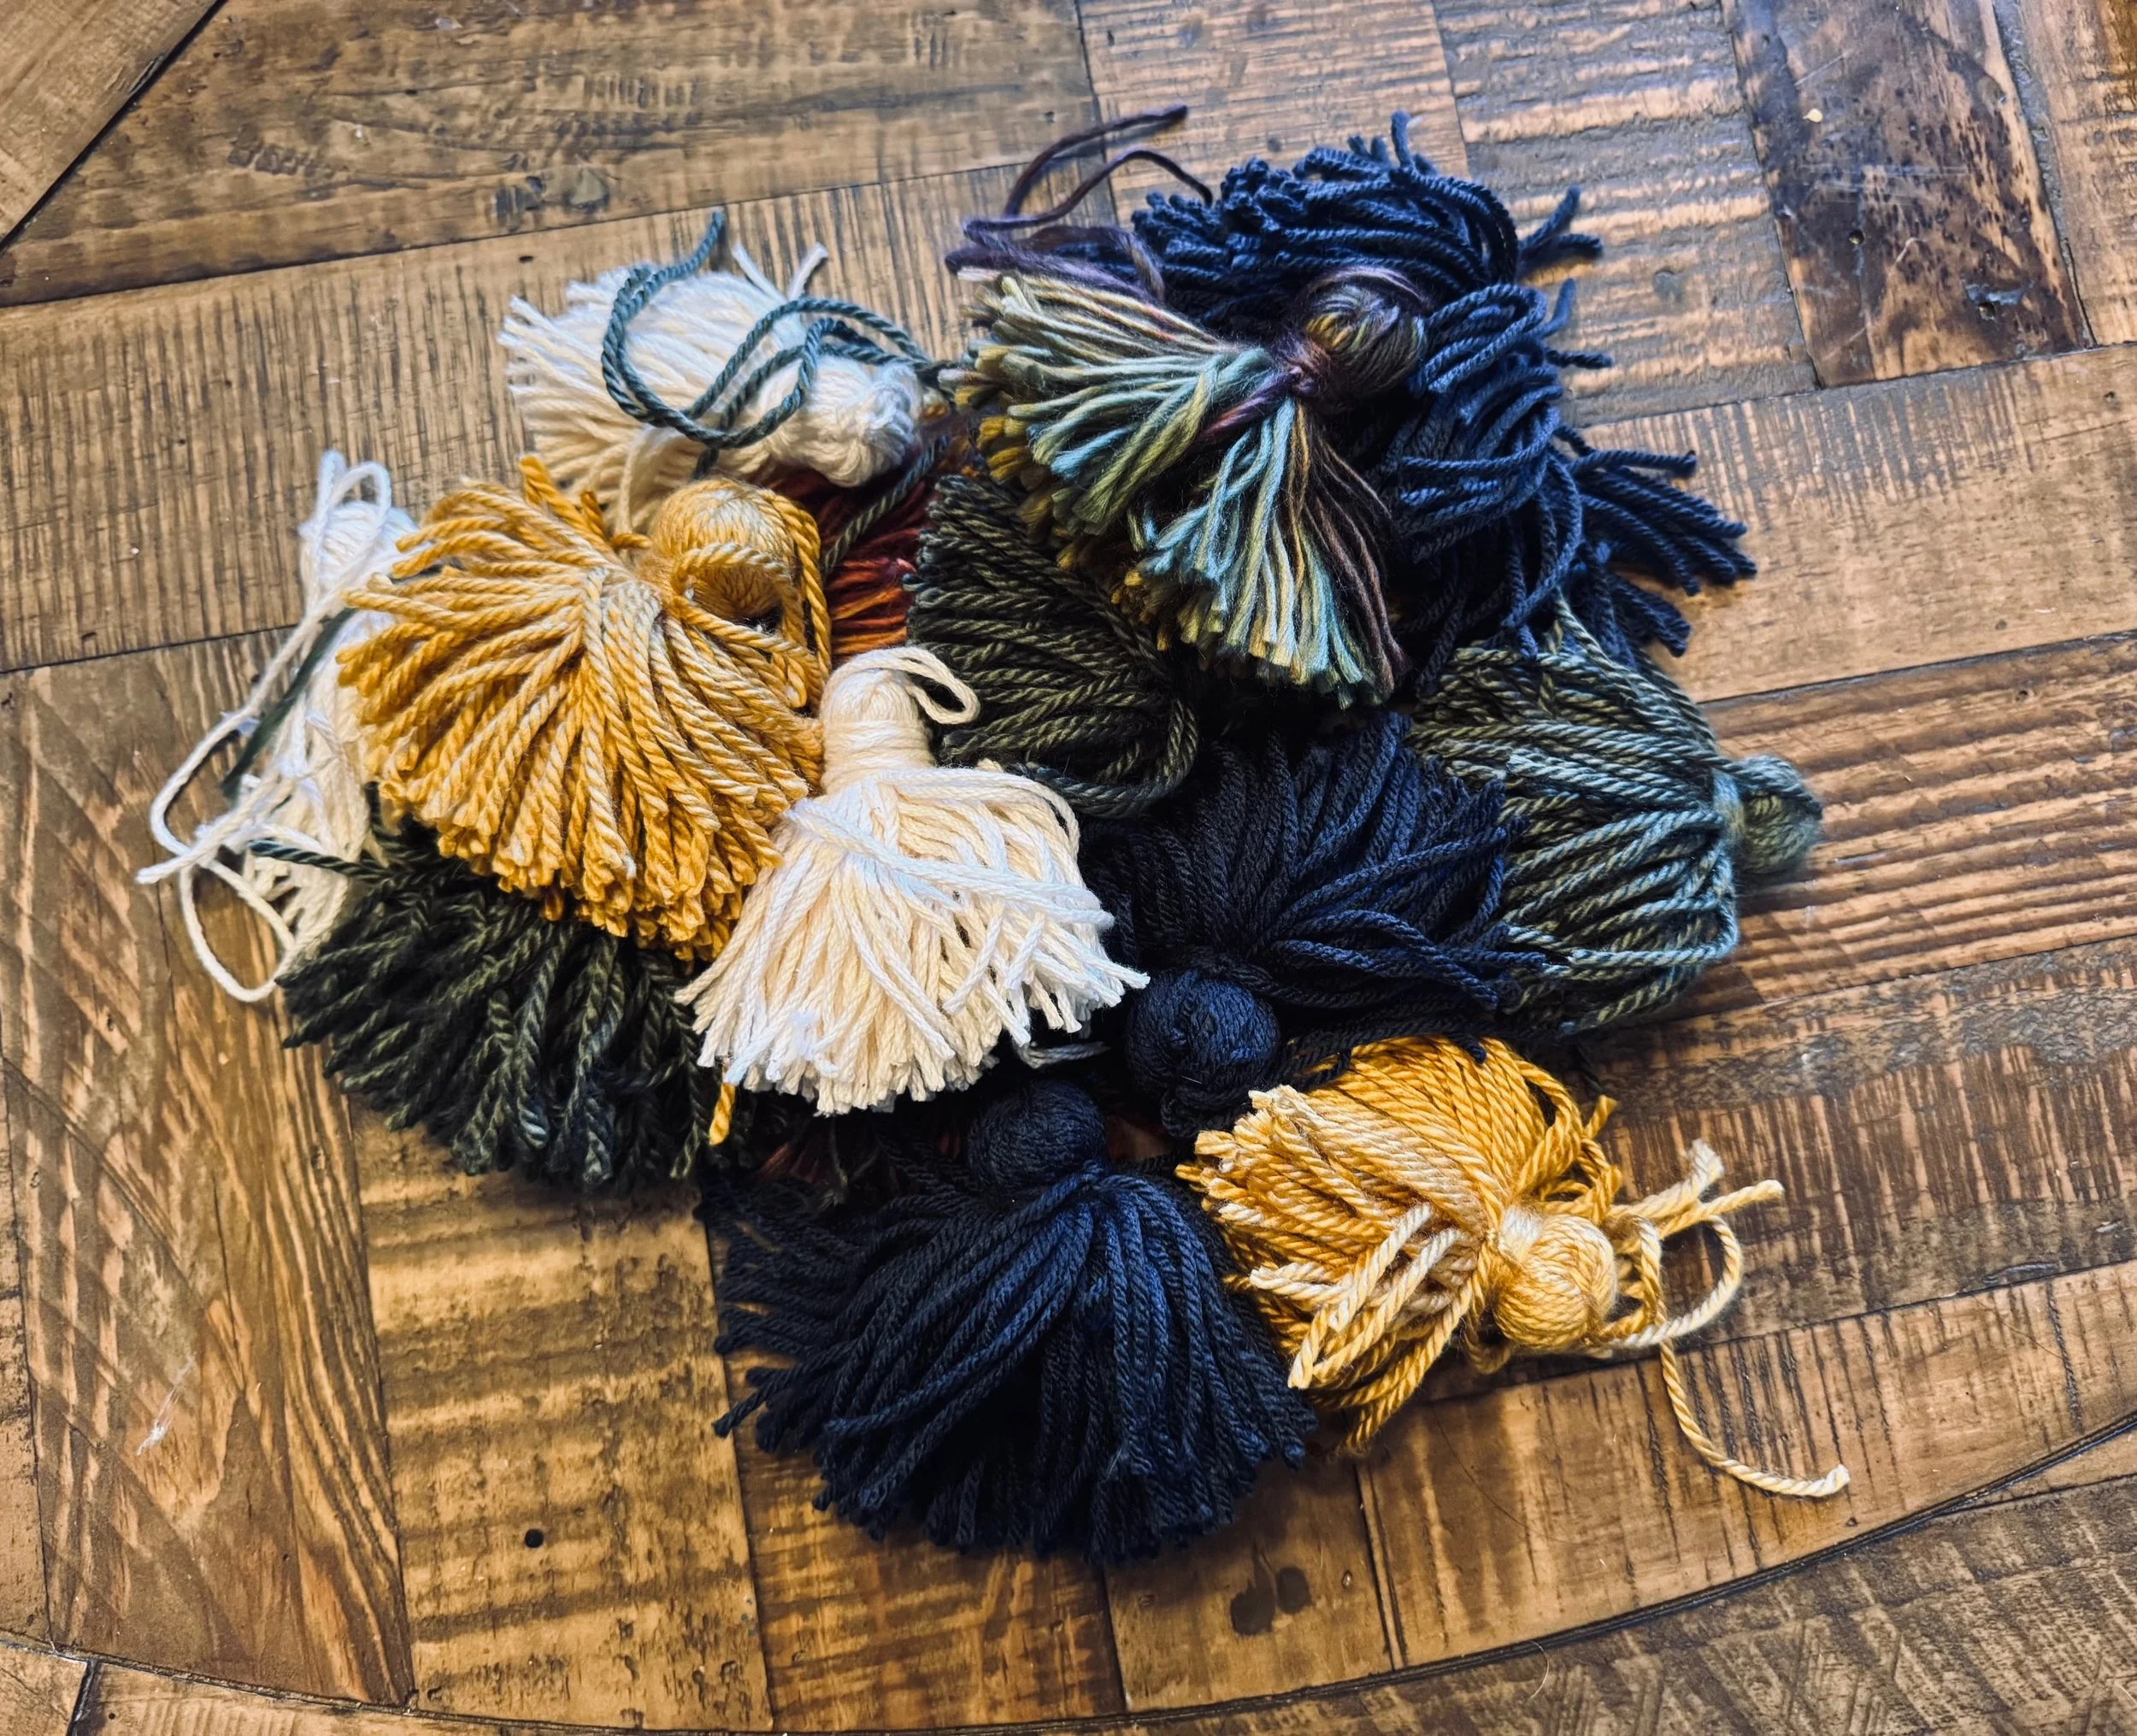
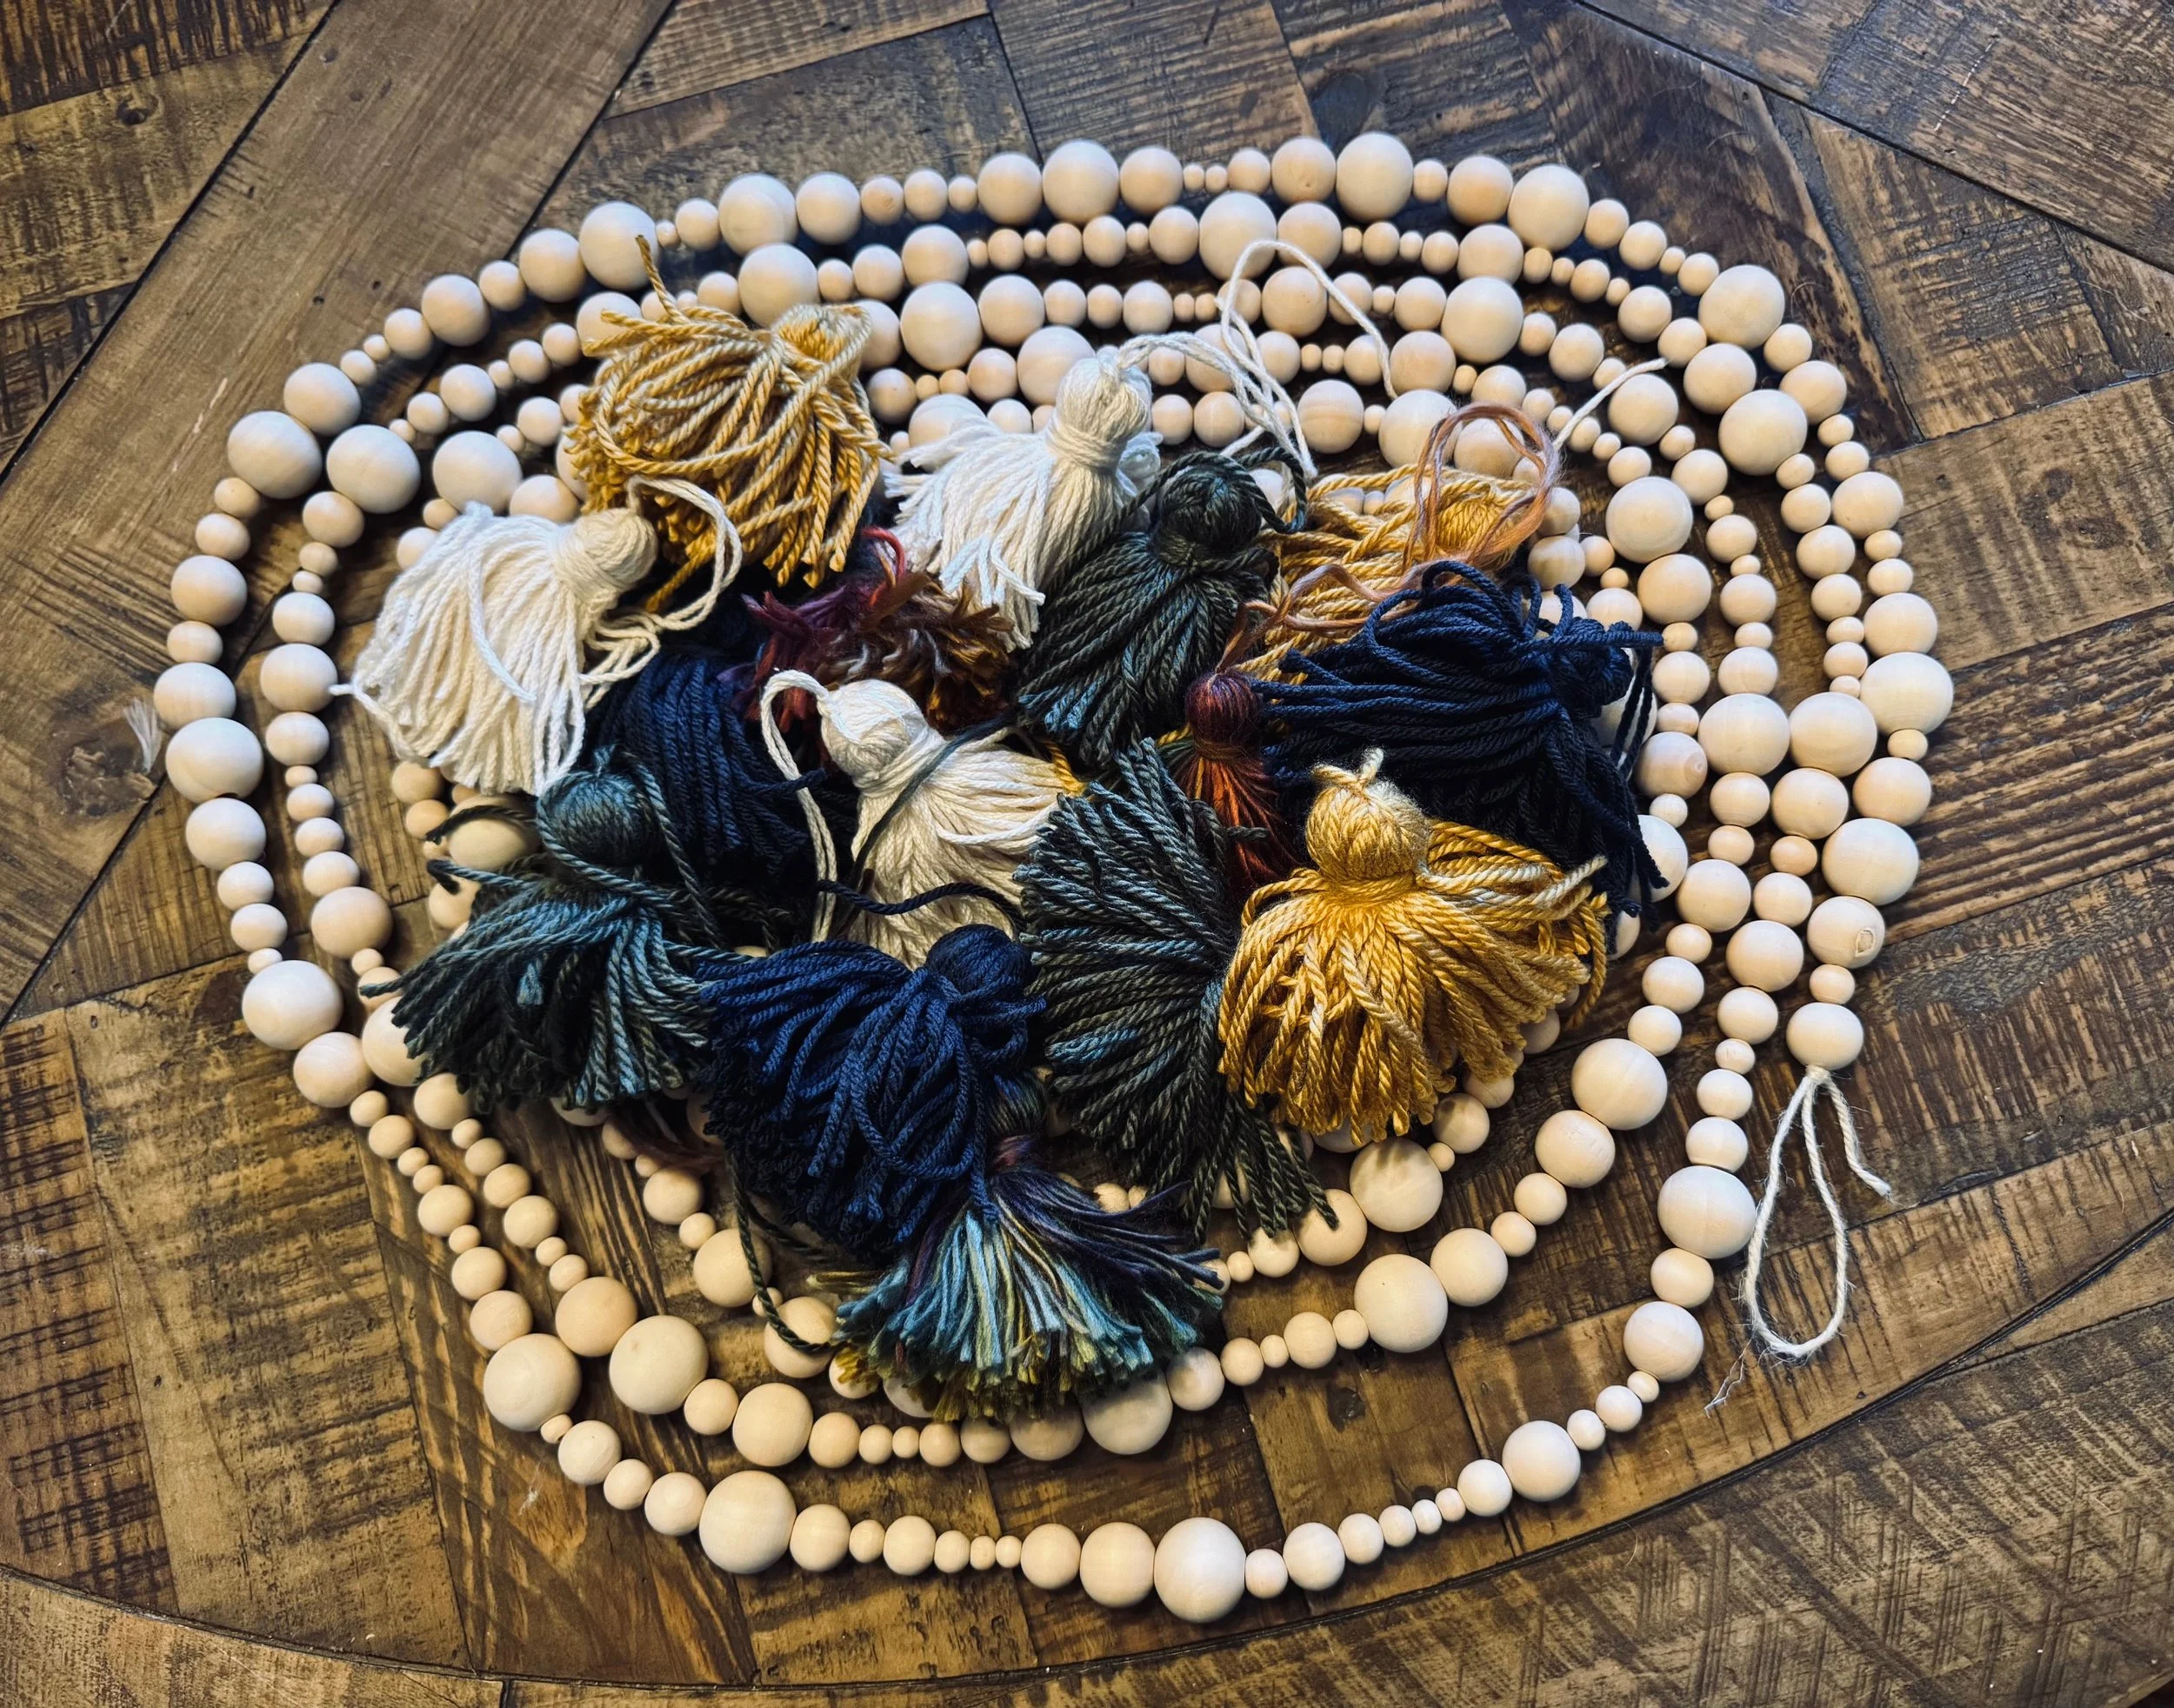
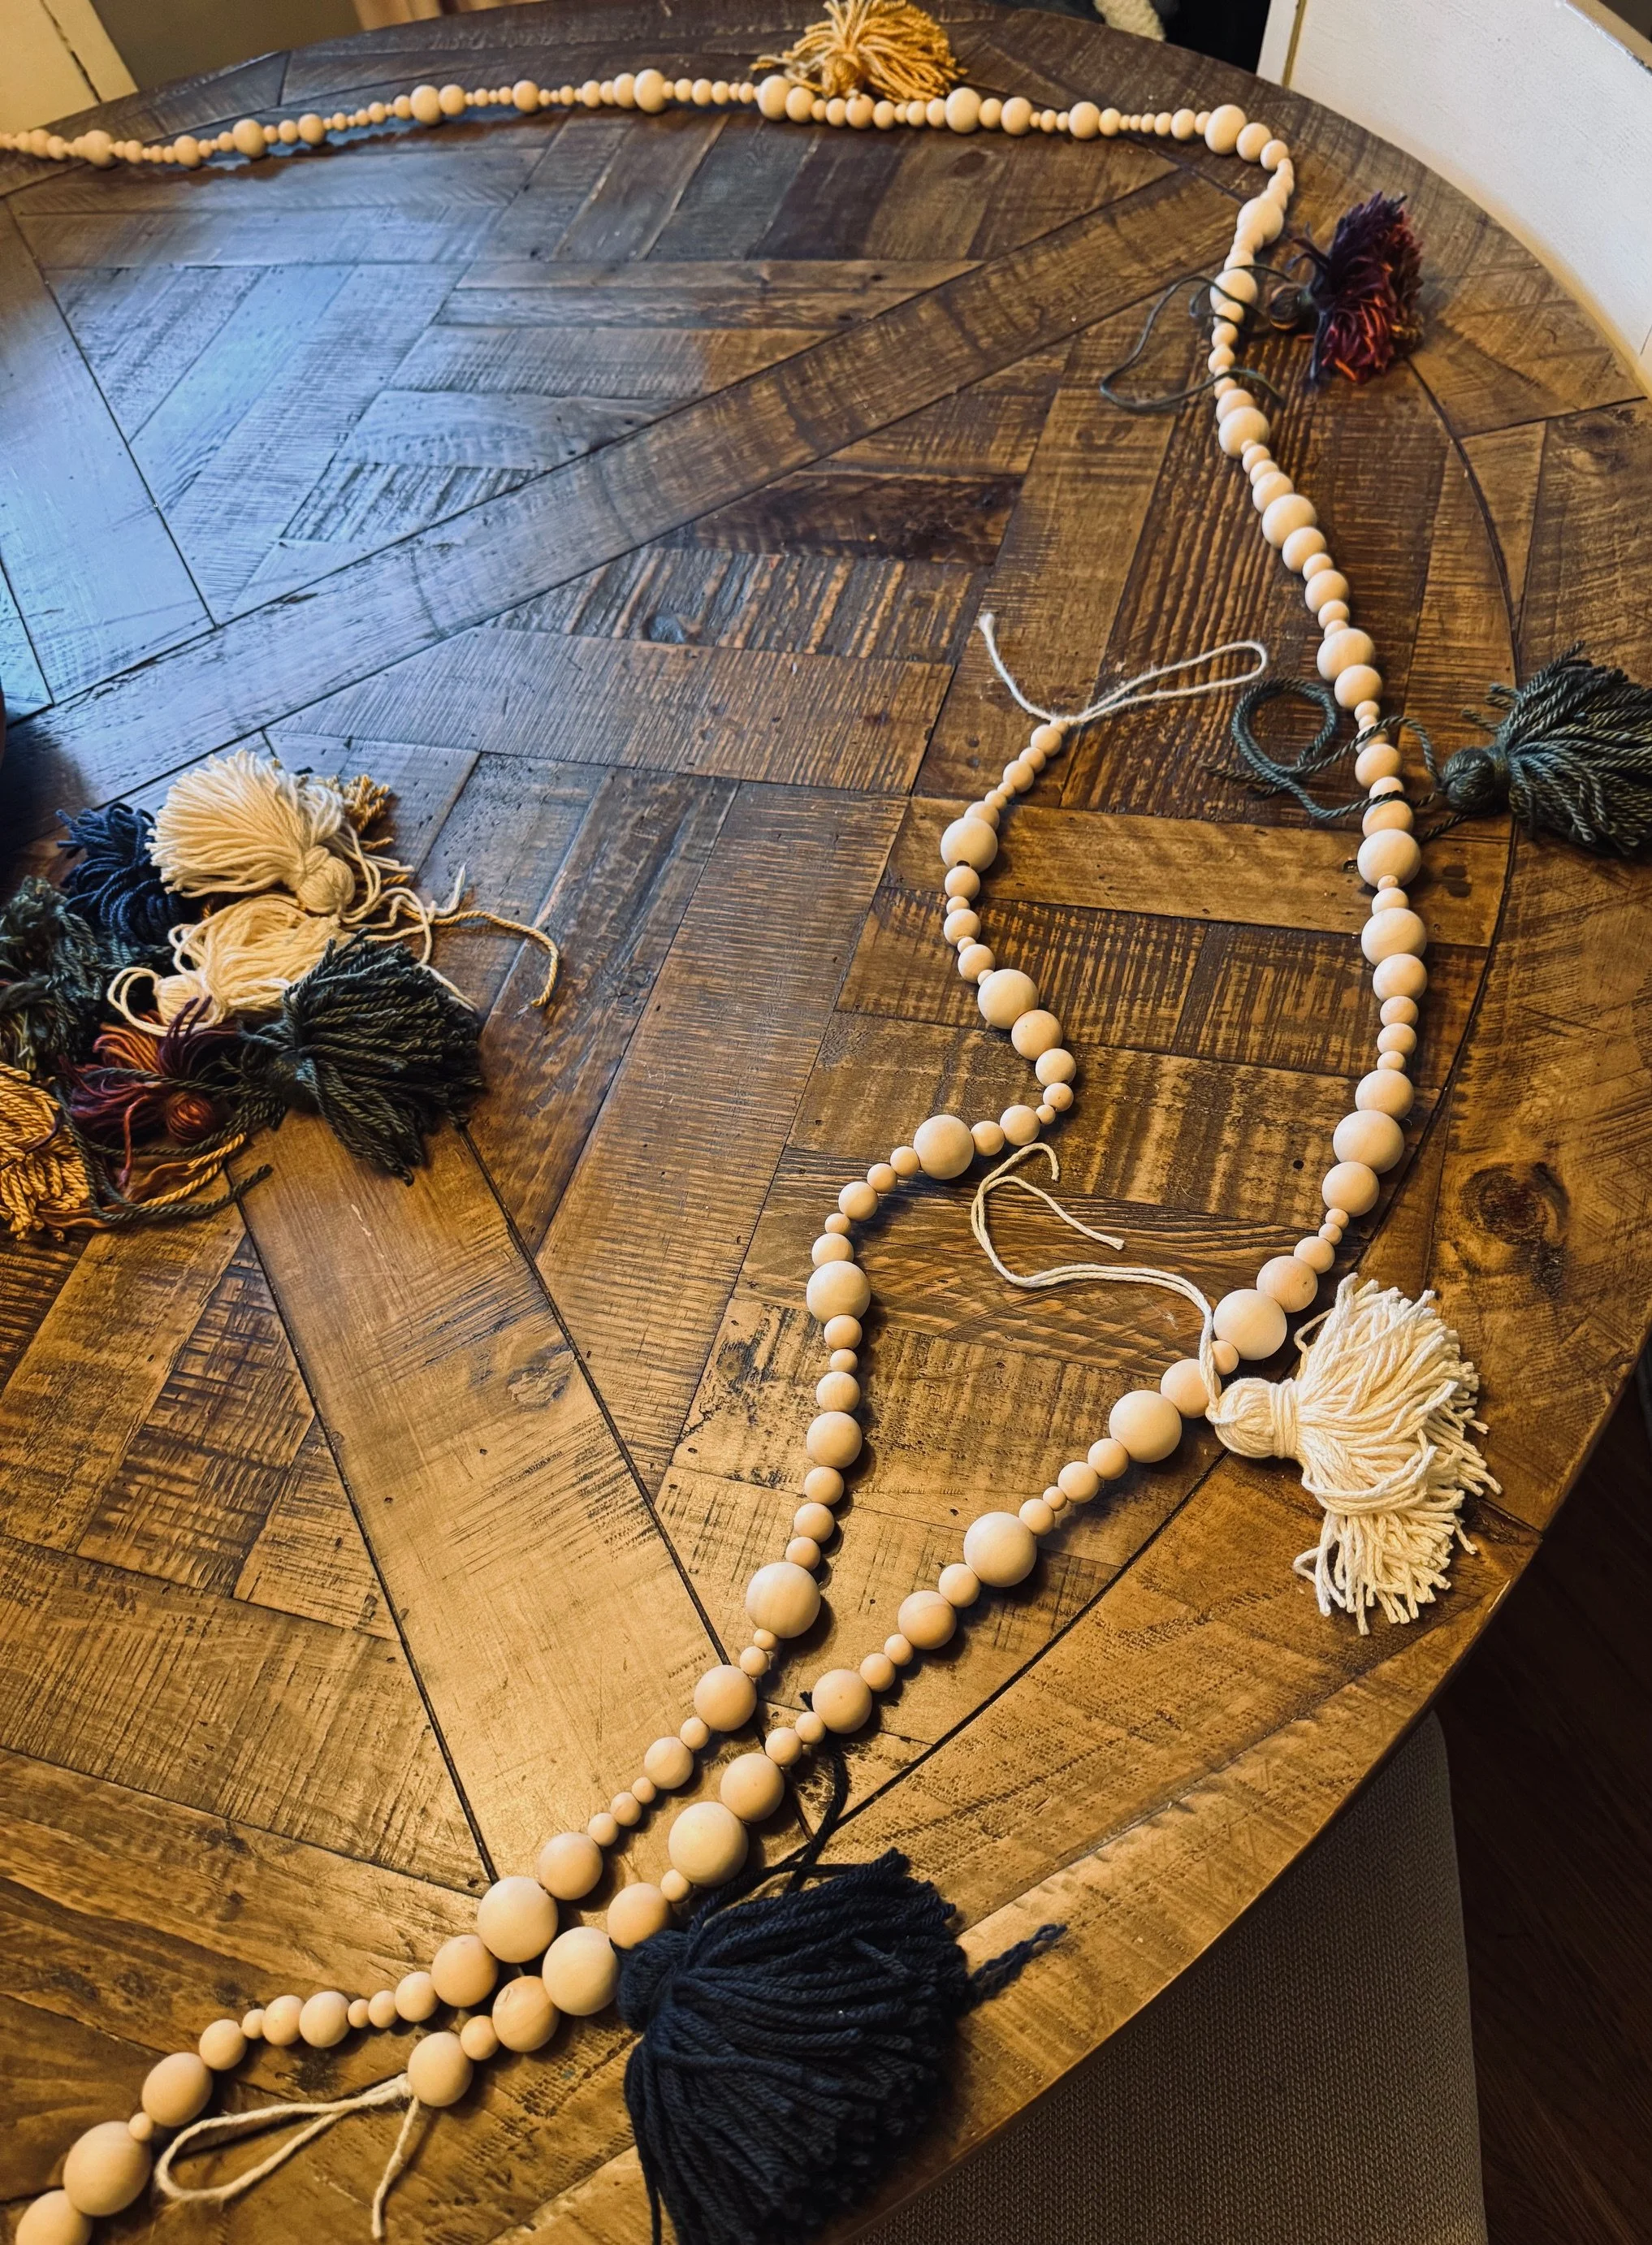
2. Beaded Garland with Yarn Tassels (1 long strand) - DONE(ISH)
Wood beads strung together with yarn tassels interspersed throughout. This is going to do a lot of visual work on the tree—it's texture, movement, and that natural wood tone ties everything together. Still working on the tassel layout, but we’ll get there.
Materials I have: Wood beads (light brown), jute twine, yarn in coordinating colors
Time investment: Medium (repetitive but not difficult) - 2.5 hours
3. Yarn-Wrapped Wooden Rings (6-8 pieces)
I forgot I had these wooden rings until I dug through my stash. I'm wrapping them in yarn and adding pompoms and tassels. Still figuring out the exact execution, but the vibe is very boho-meets-vintage-craft-fair.
Materials I have: Wooden rings, yarn, pompom maker
Time investment: Quick to medium
4. Fabric Scrap Ball Ornaments (8-10 pieces)
Fabric scraps from my stash wrapped or decoupaged onto balls (probably crumpled paper or styrofoam if I can find any). Think papier-mâché but grown up. Very quilted-ornament-from-the-1950s vibes. Uses up scraps, adds texture, and I can control the colors perfectly.
Materials I have: Fabric scraps in coordinating colors, glue, string, stuffing materials
Time investment: Medium
5. Embroidered Ornaments (4-6 pieces)
This is the one I'm most excited about. Small, embroidered pieces (maybe on felt or fabric) that I'm going to stiffen with Mod Podge, so they hold their shape and last. I have this thought in my head of delicate, vintage-looking ornaments with visible stitching. We'll see if reality matches the idea.
Materials I have: Felt, fabric scraps, embroidery thread in dozens of colors, Mod Podge
Time investment: Long (embroidery takes time, but it's meditative)
6. Folded Paper Ornaments (8-12 pieces)
Dimensional folded paper in vintage book pages or painted cardstock. Think paper fans, folded stars, accordion-style shapes. Very mid-century craft movement. These will be quick filler pieces that add visual interest without a ton of effort. I say quick, but for me that’s probably a lie. For the person who doesn’t get disoriented just thinking about twists and turns and folds, it’s quick.
Materials I have: Cardstock, old book pages, paint, markers, glue
Time investment: Quick
BONUS: Giant Yarn Pompom Tree Topper (1 piece, maybe a cluster?)
Still working out the details, but I'm thinking a massive yarn pompom or maybe several pompoms fashioned together into something gloriously fluffy and imperfect. The flocked tree deserves a soft, cozy topper.
Materials I have: Yarn in coordinating colors
Time investment: Medium
What I Already Have
This is the beautiful part: I don't need to buy anything (yet). Everything on this list uses materials I already have in my craft stash. Flour and salt for the dough. Yarn and embroidery thread I've been hoarding for years. Fabric scraps from old projects. Wood beads I bought back in 2020 for something else and had a ton of leftovers. Paper, paint, markers, Mod Podge.
The budget so far? $0.
Will that change? Maybe. If I run out of glue or realize I need something specific, I'll add it and document the cost. But right now, this is truly a "make it from what you have" situation.
What I Still Need to Figure Out
Here's the parts I’m still working through in my old noggin:
Wooden ring details: I know I want tassels and pompoms, but I'm not sure about the exact execution. Do I wrap the whole ring in yarn first? Leave part of the wood exposed? We'll see what looks good as I go.
Topper execution: One giant pompom or a cluster? How do I attach it so it doesn't look sad? TBD.
Quantities: I've given approximate numbers, but those might change based on how the tree looks as I go. If it needs more, I'll make more. If it looks full with less, I'll stop.
This is part of the process. I'm figuring it out in real time, and you're watching it happen.
The Timeline
Here's my rough plan for the next week:
This weekend (Nov 8-9): Start salt dough ornaments
Next week (Nov 10-14): Work on fabric balls, wooden rings, and paper ornaments
Following week (Nov 15-18): Embroidered ornaments and topper
But realistically? I'll probably bounce between projects depending on what I feel like doing and what's drying/setting. The embroidered pieces take longer, so I'll likely work on those throughout the whole process.
What's Next
Monday's post (Nov 10) will be a progress report. What's working, what's harder than I thought, what I've pivoted on. I'll share photos (bad ones, remember?) and actual updates on how this is going and maybe some tutorials if I do something whack-a-doo that’s not overly done on Pinterest.
For now, I'm feeling good about this plan. It's cohesive, it's realistic, and it uses what I have. That's the whole point.
See you Monday with (hopefully) some finished ornaments or at least some major progress.
Follow along on Facebook, Instagram, TikTok, and LinkedIn for visuals and bite-sized insights from this piece and others. And if this resonated, share it with someone else who gets it.
Sign up here to receive our newsletter and stay connected!
About the Author
Gal is an autistic artist, late-diagnosed at 49, and the creator of AuRTistic Expressions—a space where neurodivergent truth meets creative survival. Through books, blog posts, printables, and coaching, Gal explores what it means to unmask safely, communicate authentically, and make art that doesn’t ask for permission. Stick around—there’s plenty more where this came from.
AI generated bio
This post contains affiliate links